Tuesday, December 6, 2011

Buying a vacant property in Coon Rapids? Familiarize yourself with their "Water Restoration Permit" first.

I recently had a friend go through a huge hassle to get his water turned on after buying a vacant property in Coon Rapids.  His plan was to buy the house, get the water turned back on, and live in the house while he remodeled it going room by room.
Shortly after buying the home, he contacted the city of Coon Rapids to have the water turned back on, and they told him they would need to inspect the house first.  The city ended up having a huge list of repairs that he would need to complete before moving in to the house, and he ended up moving in about two months later than his planned move-in date.
I called the building inspections department in Coon Rapid to ask about this, and as it turns out, these inspections have been required in Coon Rapids for about the last three years.  Apparently, the city of Coon Rapids will turn off the water supply to any property that is known to be vacant; they do this to reduce the risk of property damage from burst or frozen water pipes.  That’s pretty standard procedure for just about any bank owned property, but the huge difference with Coon Rapids is the water restoration permit.
Before the city of Coon Rapids will turn the water back on to a property, they need to have a Water Restoration Permit application filed, along with a $75 inspection fee.  After this permit gets filed, they’ll inspect the property for safety.  If the house passes the inspection, they’ll turn the water on.  If the house doesn’t pass the inspection, repairs will need to be completed before the water can be turned back on.  Below is a list of the items that would prevent the water from being turned on – I copied this text exactly from their Water Restoration Permit form:
  • Furnace – Furnace must be operable & providing heat to dwelling.
  • Water heater – Must be correctly installed & operable.
  • Furnace or Water heater installed without a permit or inspection – *All plumbing & mechanical work must be permitted.
  • You may be required to hire a licensed contractor to inspect and pull permits for previously installed equipment per requirements of the Minnesota State Building Code.
  • Gas or Electric service – Service must be ‘turned on’ to property.
  • Wiring/exposed wiring – *Dwelling must not have any exposed wiring.
  • Plumbing – Dwelling must meet the ‘Minimum standards of habitation’& may not have any broken or damaged water pipes.
  • ‘Minimum standard’ is defined as a functioning kitchen sink, lavatory sink, water closet, shower or bathtub & proper back flow prevention.
  • Severe mold issues- A ‘Mold Remediation’ report may be required. (Please discuss plans for mold cleanup with Bldg Dept. staff)
  • Building must be weather tight – Dwelling must not have any door or window openings that are not covered.
  • Severe structural problems – As deemed by City of Coon Rapids Building Official.
  • Other items that could be deemed as a life safety concern.
  • Dwelling ‘Not habitable’ – Any circumstances deemed by the Building Official that property is unsuitable for habitation.
I asked the Coon Rapids building inspections department if there was any type of form that needs to be provided to or signed by a potential home buyer to alert them to these requirements.  They said that the water restoration permit has nothing to do with the sale of a property, so no – there are no methods in place to inform a potential home buyer of this requirement.  They leave it up to the real estate agent or home buyer to contact the city to ask about this stuff before buying a home in Coon Rapids.
The bottom line is that if you’re buying a home in Coon Rapids, this is something you need to be aware of.  I always recommend having the water turned on to a property before the home inspection, but this is especially important in Coon Rapids.  For more information about this requirement, click here – Coon Rapids water restoration information.
Reuben Saltzman, Structure Tech Home Inspections - Email - Minnesota Home Inspections
        

Tuesday, November 29, 2011

Problems with stapled shingles


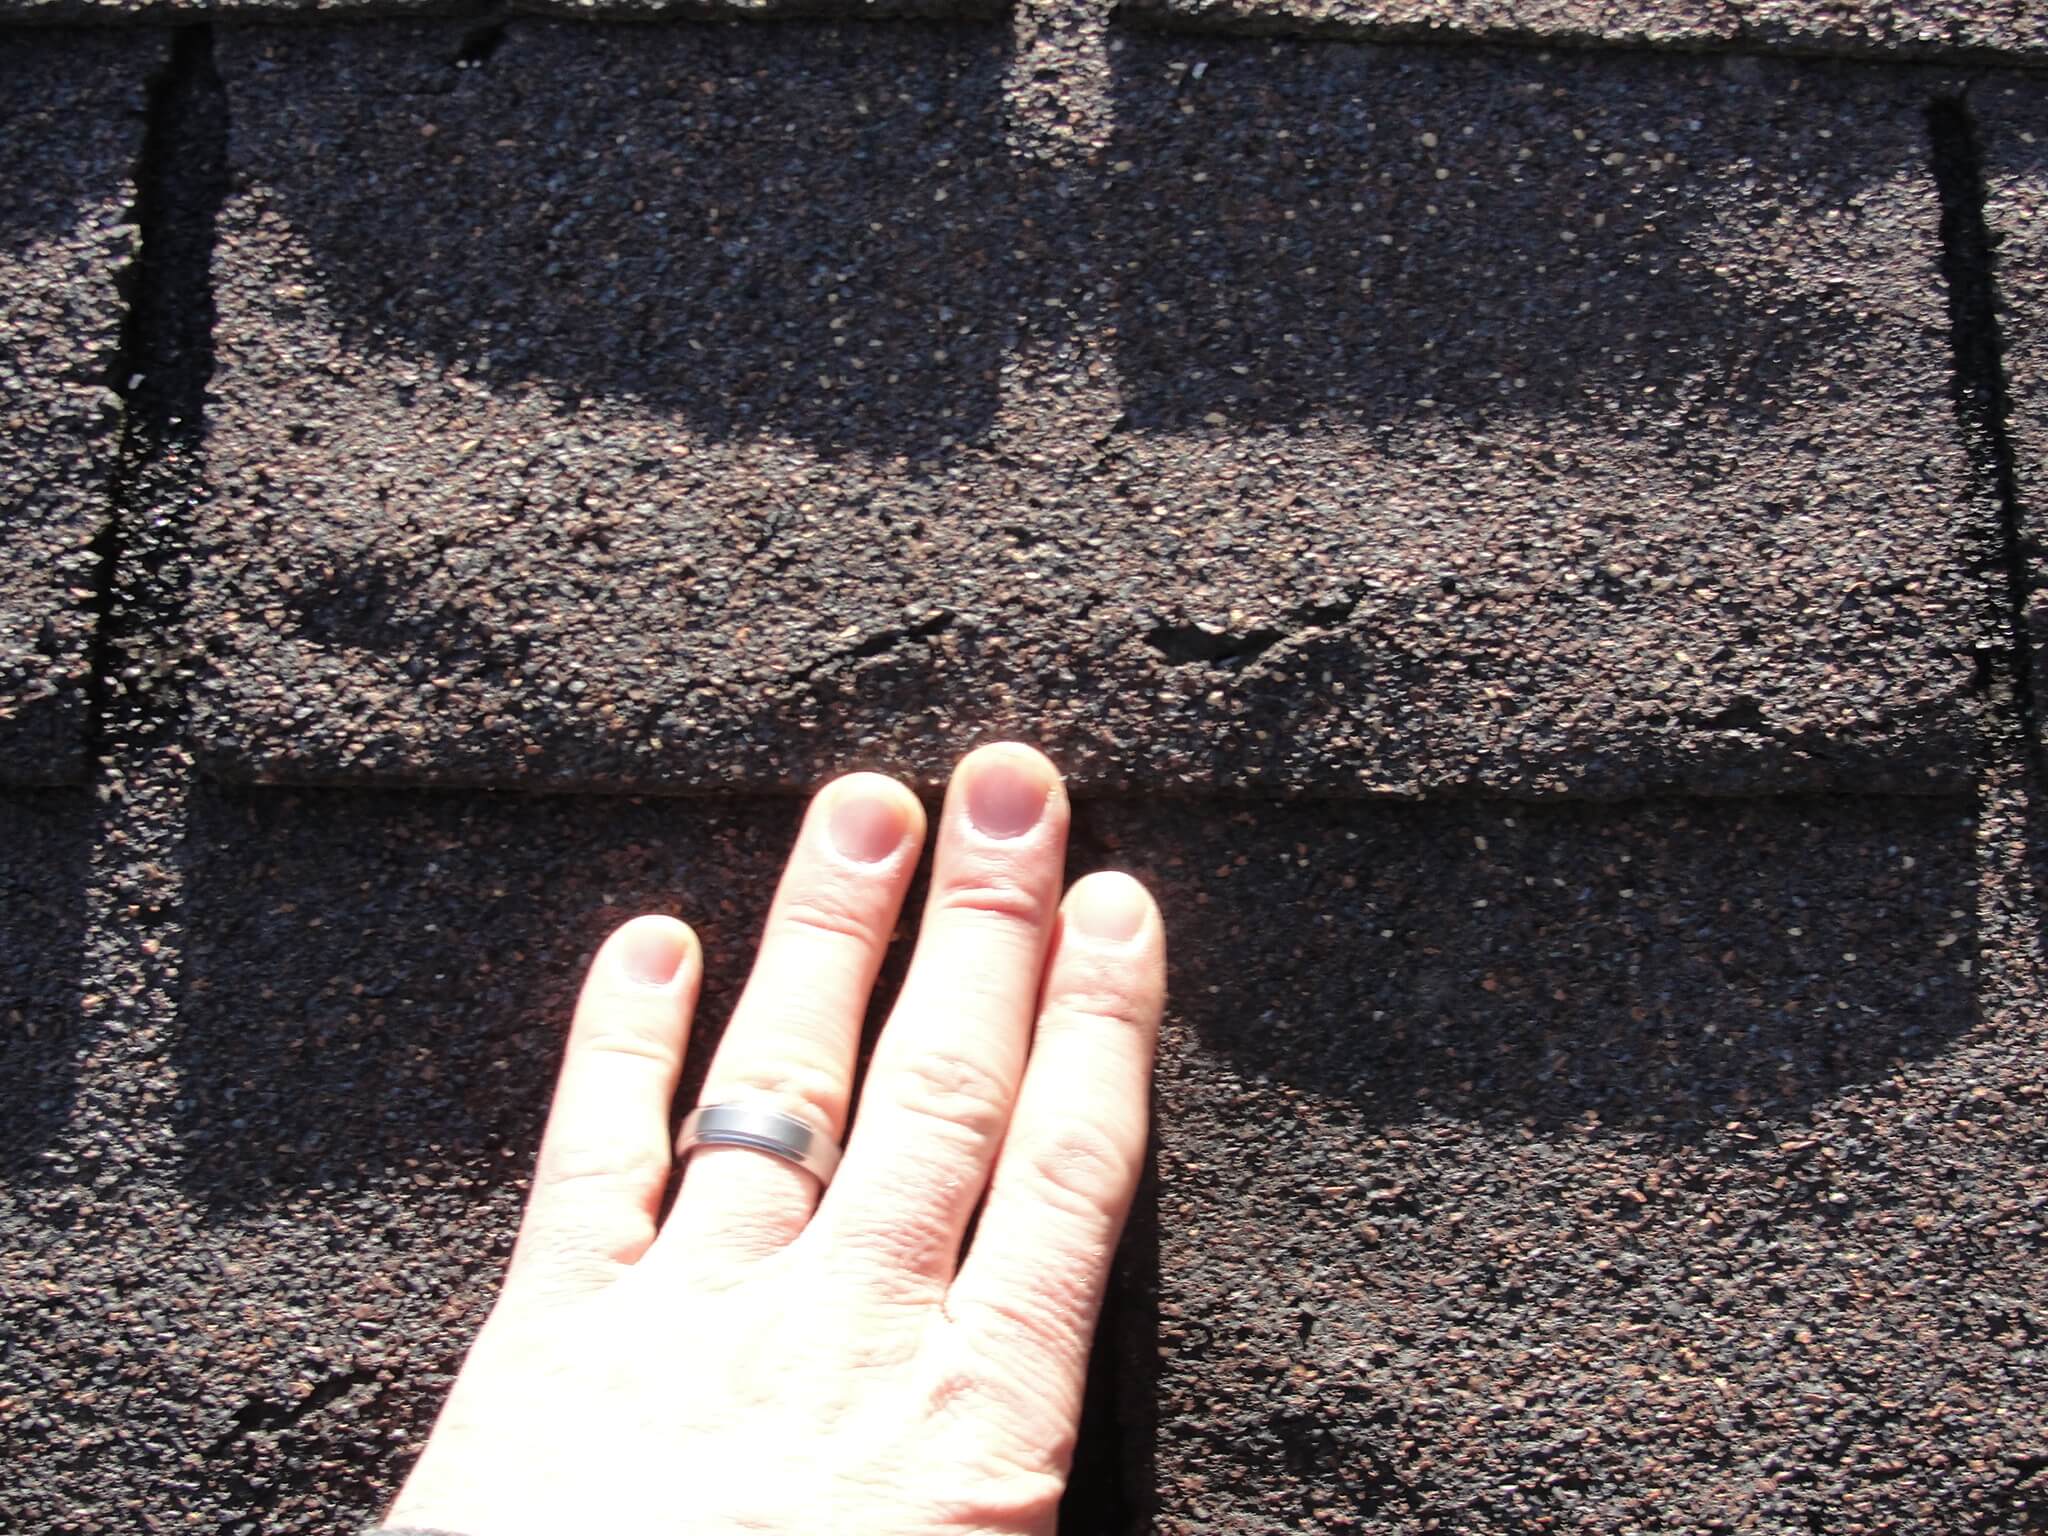
Wind damaged shingleWhile it used to be common practice to use staples to attach asphalt shingles to a roof, this has been a prohibited method of attachment in Minnesota since 2003.  Today, staples are considered an inferior method of attaching shingles to a roof, but it’s easy to understand why roofers like staples.
  • Staple guns are smaller and better balanced.  Coil nail guns are literally fed with a coil of nails, and the holder for the nails makes the gun much bulkier.
  • Staples are far less prone to jamming up in a gun than nails.
  • Staples cost less money.
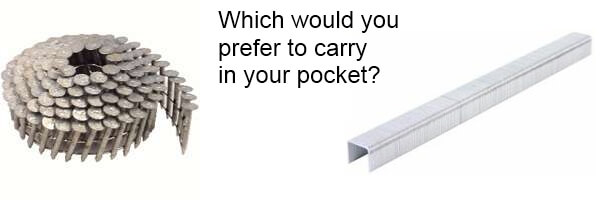
  • Staples are much more compact; a roofer can hold a bunch of sticks of staples in their pocket and reload their gun very quickly.  Nail coils take up a lot more space, they take more time to reload, and they need to be treated carefully; if a coil of nails gets dropped or stepped on, it deforms the coil and makes it much more prone to jamming in the gun.
Staples vs nails
Staples are used because they make the roofer’s job easier; they don’t equate to a better installation.
The problem with stapled shingles is that they have a much greater chance of coming loose or blowing off the roof because staples are so easy to install improperly.  When a roofer holds a staple gun and fastens a shingle, the staples will have a tendency to be driven at an improper angle.
Staples are often improperly installed because it’s somewhat awkward to hold a staple gun completely perpendicular to the shingle.  For someone who is right handed, it’s much easier to shoot the staples on the left side of their body at an angle similar to a forward slash, and the staples on the right side at an angle similar to a backward slash.  The two super-crude diagrams below should help to illustrate what I’m talking about.
Crude Staple Diagram
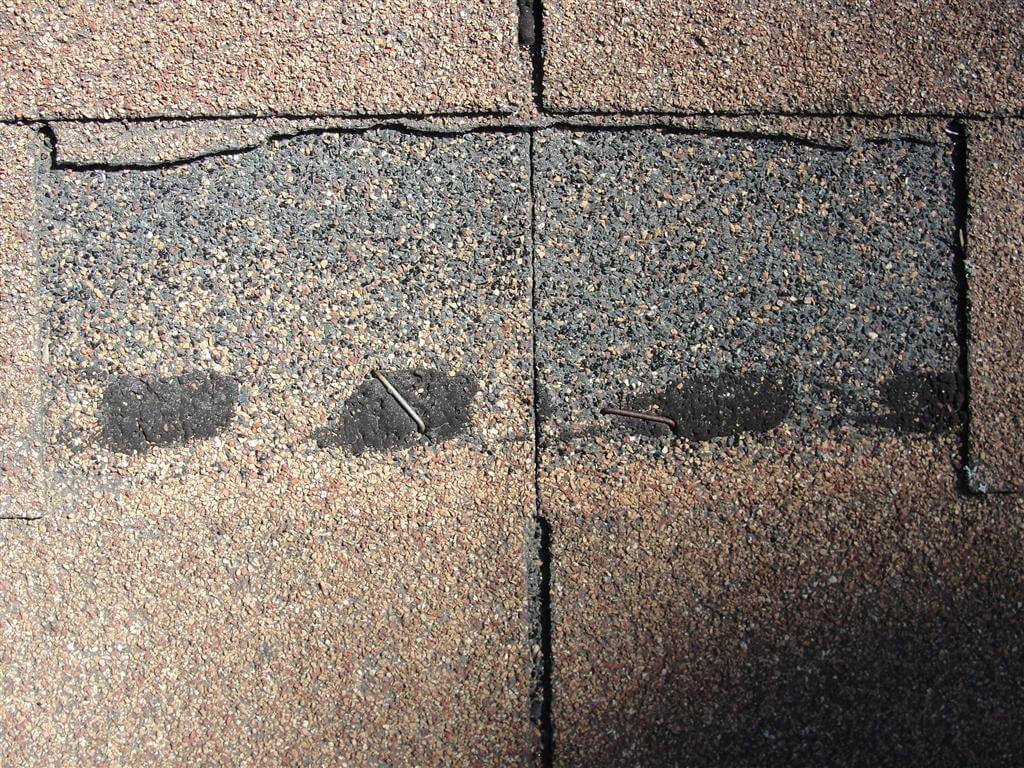
When staples are installed properly, they work fine, but they’re just too easy to install wrong.  This issue doesn’t happen with nails, because they have a round head; as long as a nail is driven in to a shingle straight, it doesn’t matter which way the nail gun is turned.  To know if a roof has been installed with staples, you can sometimes see the outline of the staples pushing through the shingle above.
Roof staples covered   Roof staples exposed
Also notice, these staples aren’t perpendicular to the shingle.  This is the installation problem that typically happens with staples.
If you have a roof that’s been installed with staples, is it a defective installation?  If it was installed after 2003, technically yes, because staples aren’t allowed any more.  If every staple was perfectly installed, the installation would work just as well as perfectly installed nails, but I’ve found improperly installed staples at every stapled roof I’ve inspected.   If you have a roof with stapled shingles, you don’t need to replace the shingles as a rule of thumb, but you’re taking on some risk.  If shingles start blowing off on a regular basis, you’ll probably want to have the roof covering replaced.  This will be less costly and less of a hassle in the long run than having to deal with constant roof repairs.
When I inspect a house with shingles that have been improperly installed, I tell the same thing to my buyers; the shingles don’t need to be replaced, but they might cause some headaches.  If shingles have already started coming loose and obvious repairs have been made, I typically recommend replacement of the roof covering.
P.S. – Special thanks to roof guru and fellow home inspector Mike Moser for always knowing the answer to any technical roofing question right off the top of his head.
Reuben Saltzman, Structure Tech Home Inspections - EmailMinnesota Home Inspections
        

Tuesday, November 22, 2011

This year, I'm thankful for closed-cell foam insulation. Yeah, that's right.

Yes, you read that right.  I’m thankful for closed cell foam insulation.  Of course, I’m thankful for my family, health, and all that other jazz, but this is a blog about home inspections and home related topics, so I’m going to stay focused on that.  To fully explain why I’m so thankful for closed cell foam insulation, I first need to complain about my house a little bit.
My thirteen-year-old house in Maple Grove has an unfinished basement with a walkout; this means about half of the basement walls have a poured concrete foundation, and the other half, the part that’s above grade, has conventional 2×6 wood framing.  The foundation walls are insulated at the exterior with rigid foam; this is a great way to insulate a foundation, because it means that the concrete walls will be relatively warm, and the potential for condensation problems will be minimized.  If you want to read more about foundation insulation methods, click this link –foundation insulation.
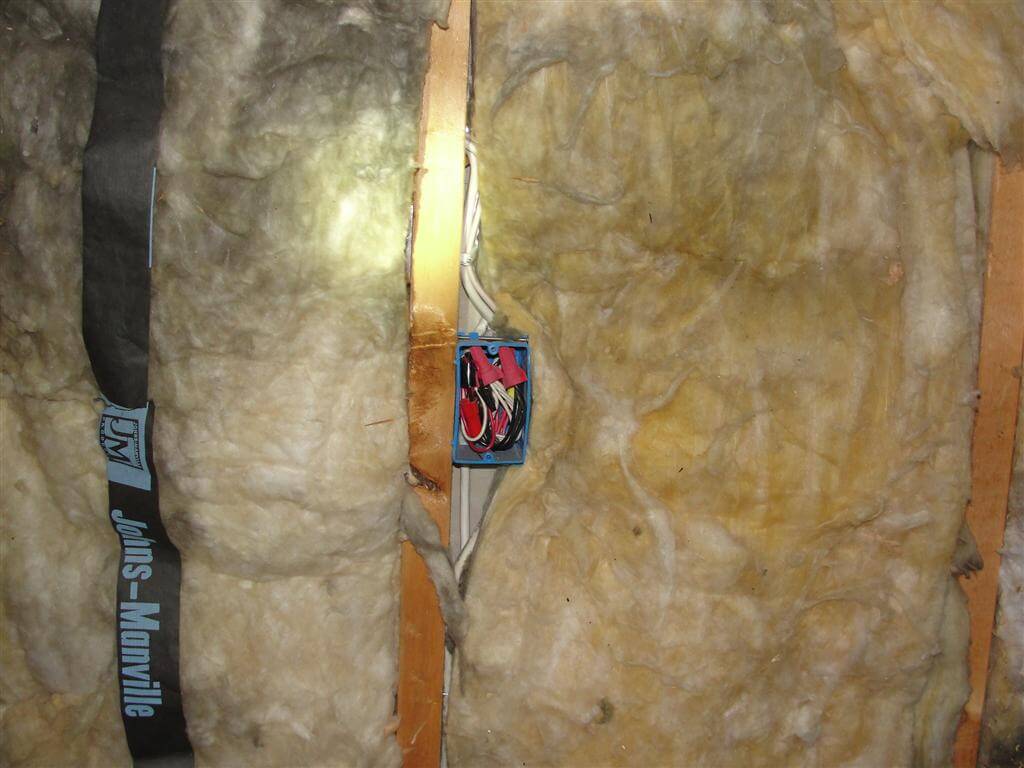
Fiberglass insulationThe stud walls, on the other hand, were insulated the same way as 99.9% of the houses in Minnesota – with fiberglass batts.  Yuck.  While this is the standard way to insulate a wall, it’s also probably the worst acceptable way to insulate a wall.  The photo at right gives a great example of how fiberglass batts are installed incorrectly all the time; just look at those gaps around the junction box.  I’ve already dedicated a blog to complaining about fiberglass batts, so enough on that topic.
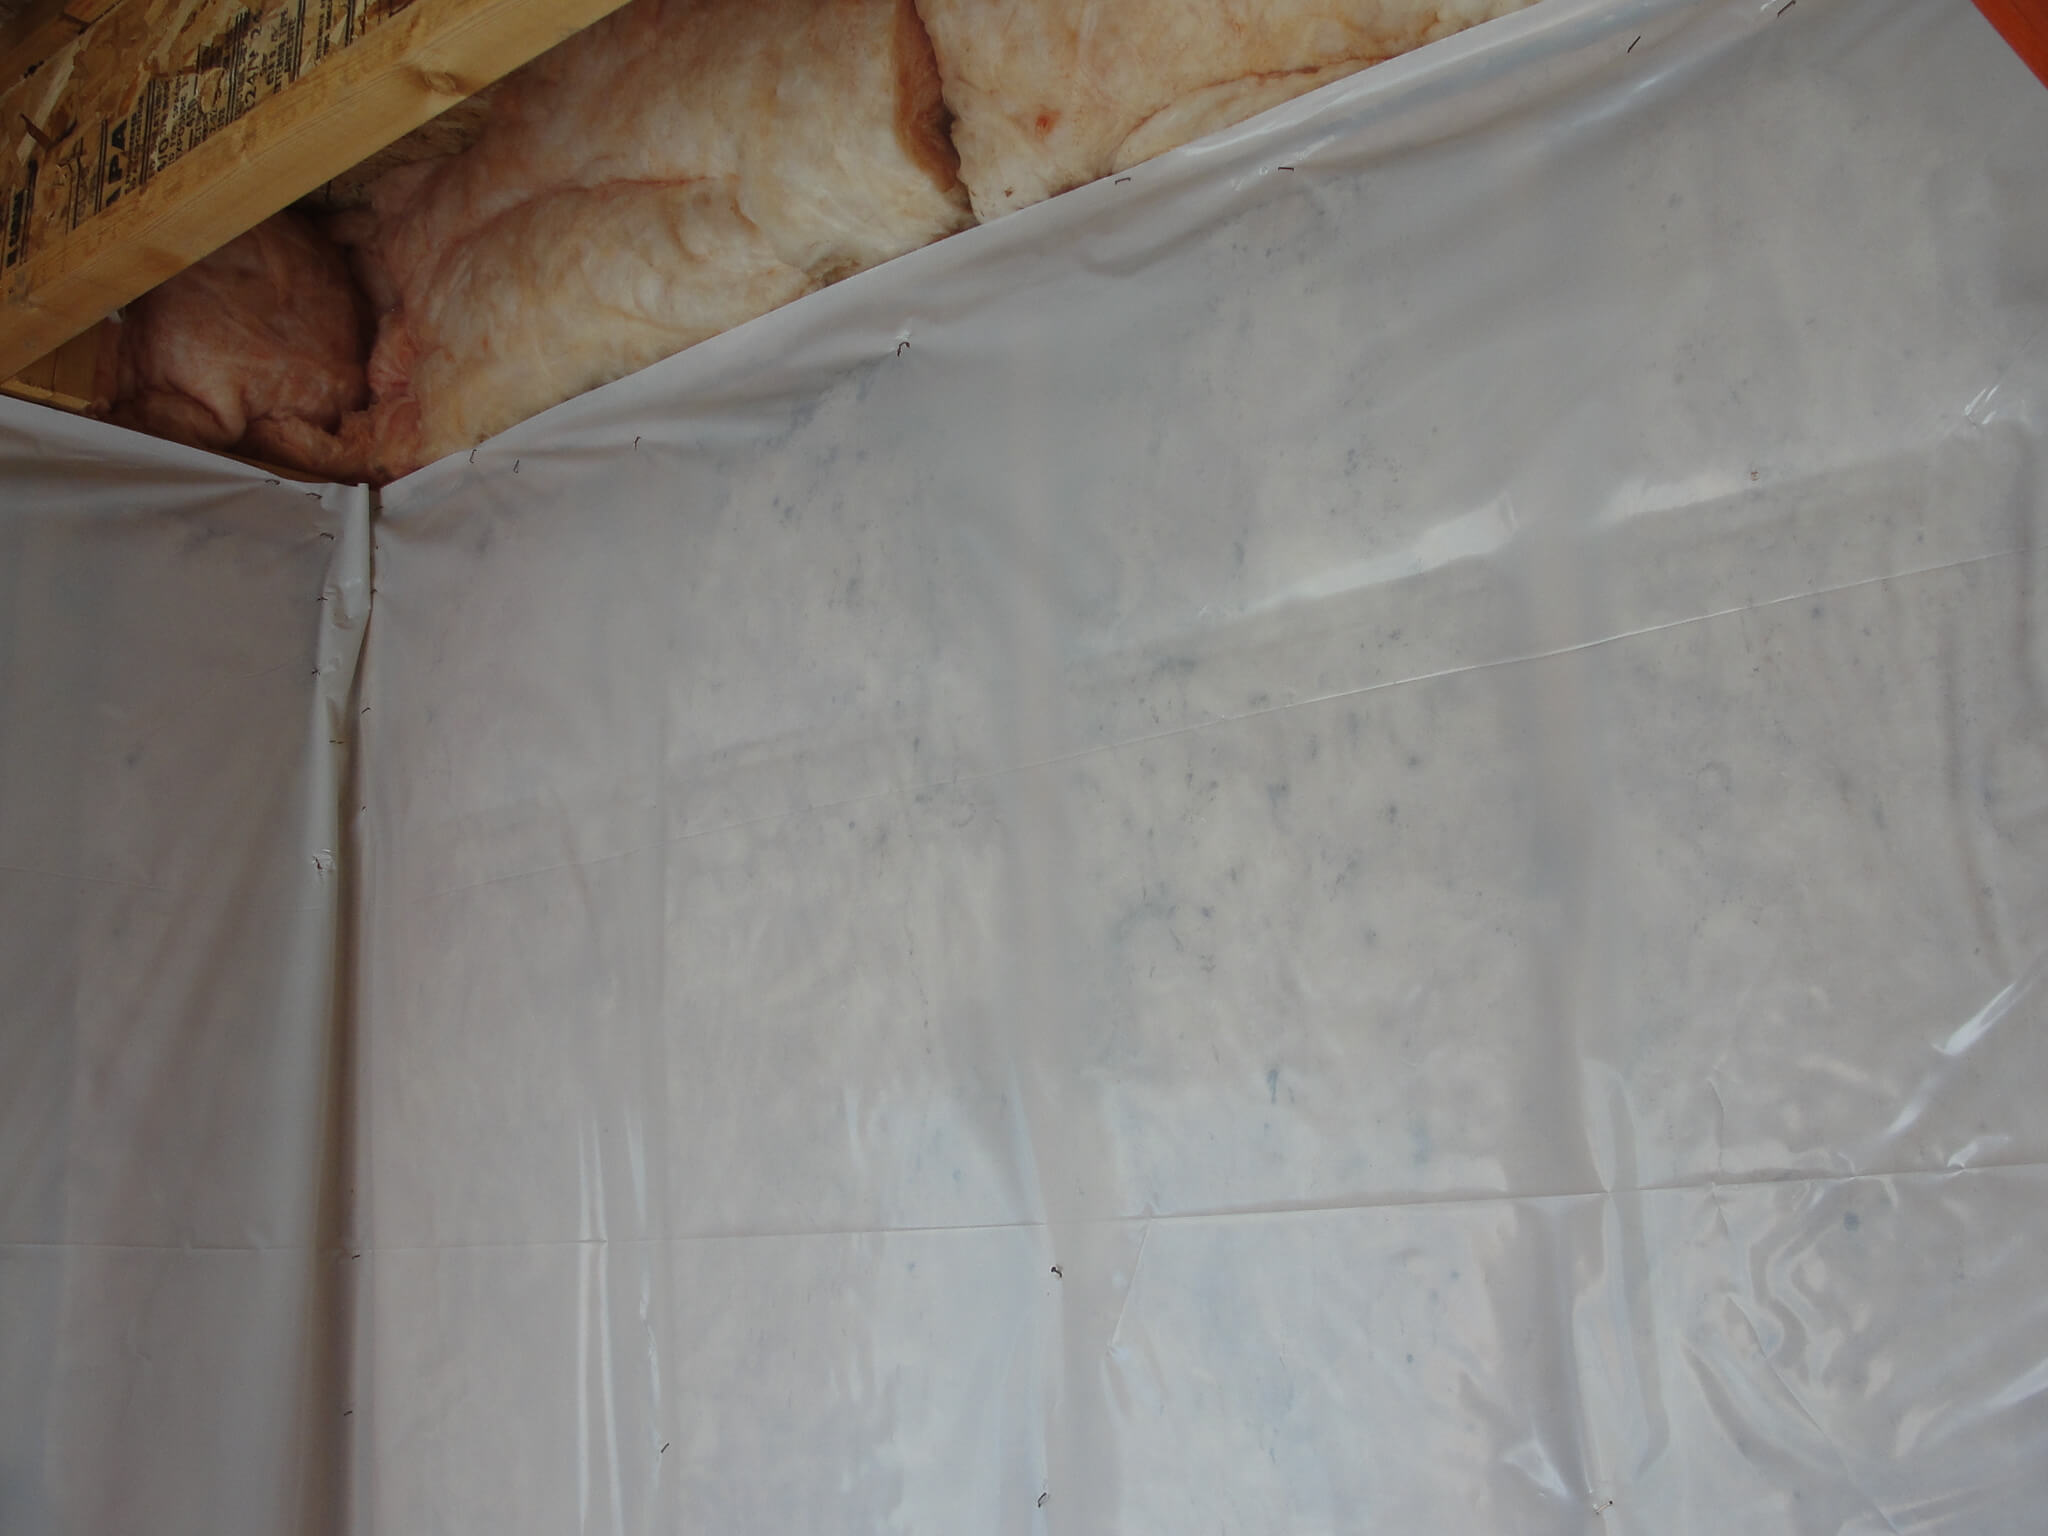
In addition to having fiberglass batts for insulation, the vapor barrier in my basement was basically useless.  Here’s how a vapor barrier is supposed to work: to prevent air from passing through the fiberglass insulation and creating moisture problems in the wall, a vapor barrier gets installed.  This consists of 6 mil polyethylene sheeting (aka ‘poly’, aka ‘Visqueen’) that has been made airtight; that means caulked, overlapped, sealed, taped, etc.  On a home built today, this will be done quite well.  On a house that’s thirteen years old… no way.  The vapor barrier will probably be just about useless.
Unsealed vapor barriers create heat loss.  Just thirteen years ago, vapor barrier were never sealed. It was standard practice to just use a stapler to throw the poly on the walls and leave everything completely unsealed.  This practice allows for air to constantly circulate within the fiberglass insulation, creating a convective loop, which means a lot of heat gets lost through the walls.
I have my ‘office’ set up in my unfinished basement, so I spend a lot of time in the basement.  During the winter it gets very cold in my basement, despite the fact that I have 2×6 walls filled with fiberglass insulation.  Last winter I kept an electric space heater under my desk to keep my toes from turning in to icicles.
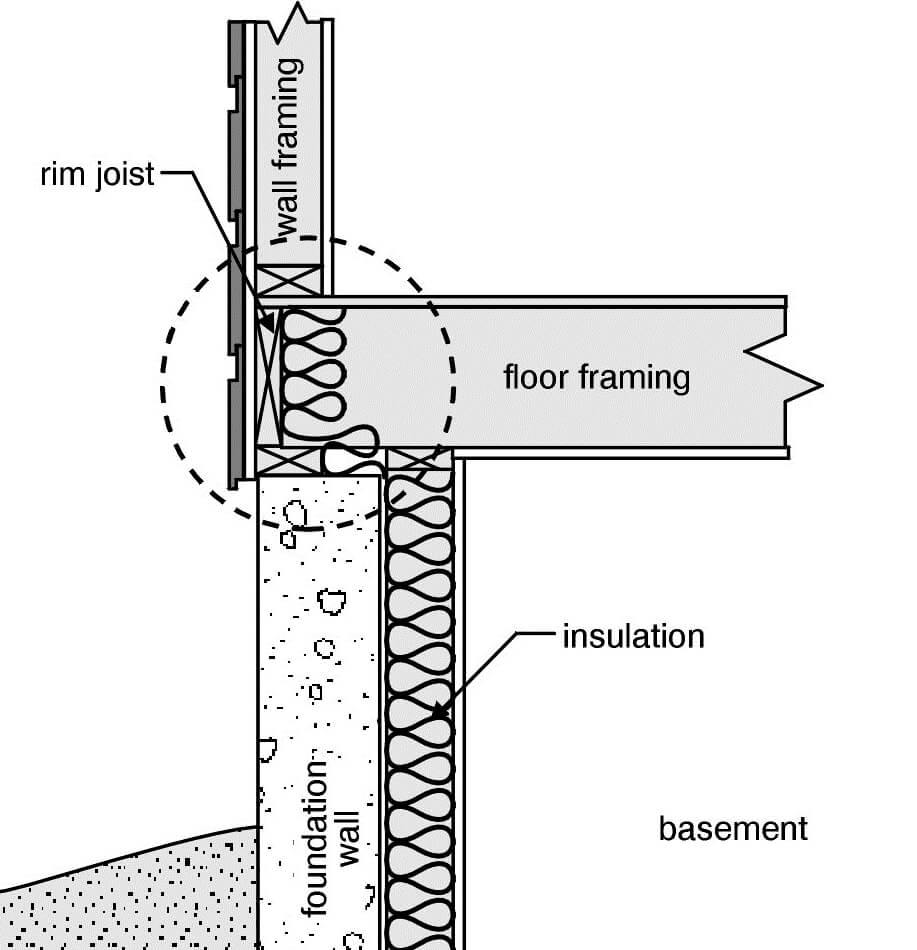
rim joist insulationFiberglass should never be used at rim spaces.  The rim space is the area between the floors of a house; this is an area where it’s nearly impossible to install a proper vapor barrier.  Without a vapor barrier, condensation can occur at the rim space, creating mold growth or eventually rotting out the rim space.  This is why fiberglass insulation should never be used here.  On new homes, it never is.  The only type of insulation that gets used on new construction homes in Minnesota is closed cell spray foam insulation; we’ll come back to that in a minute.
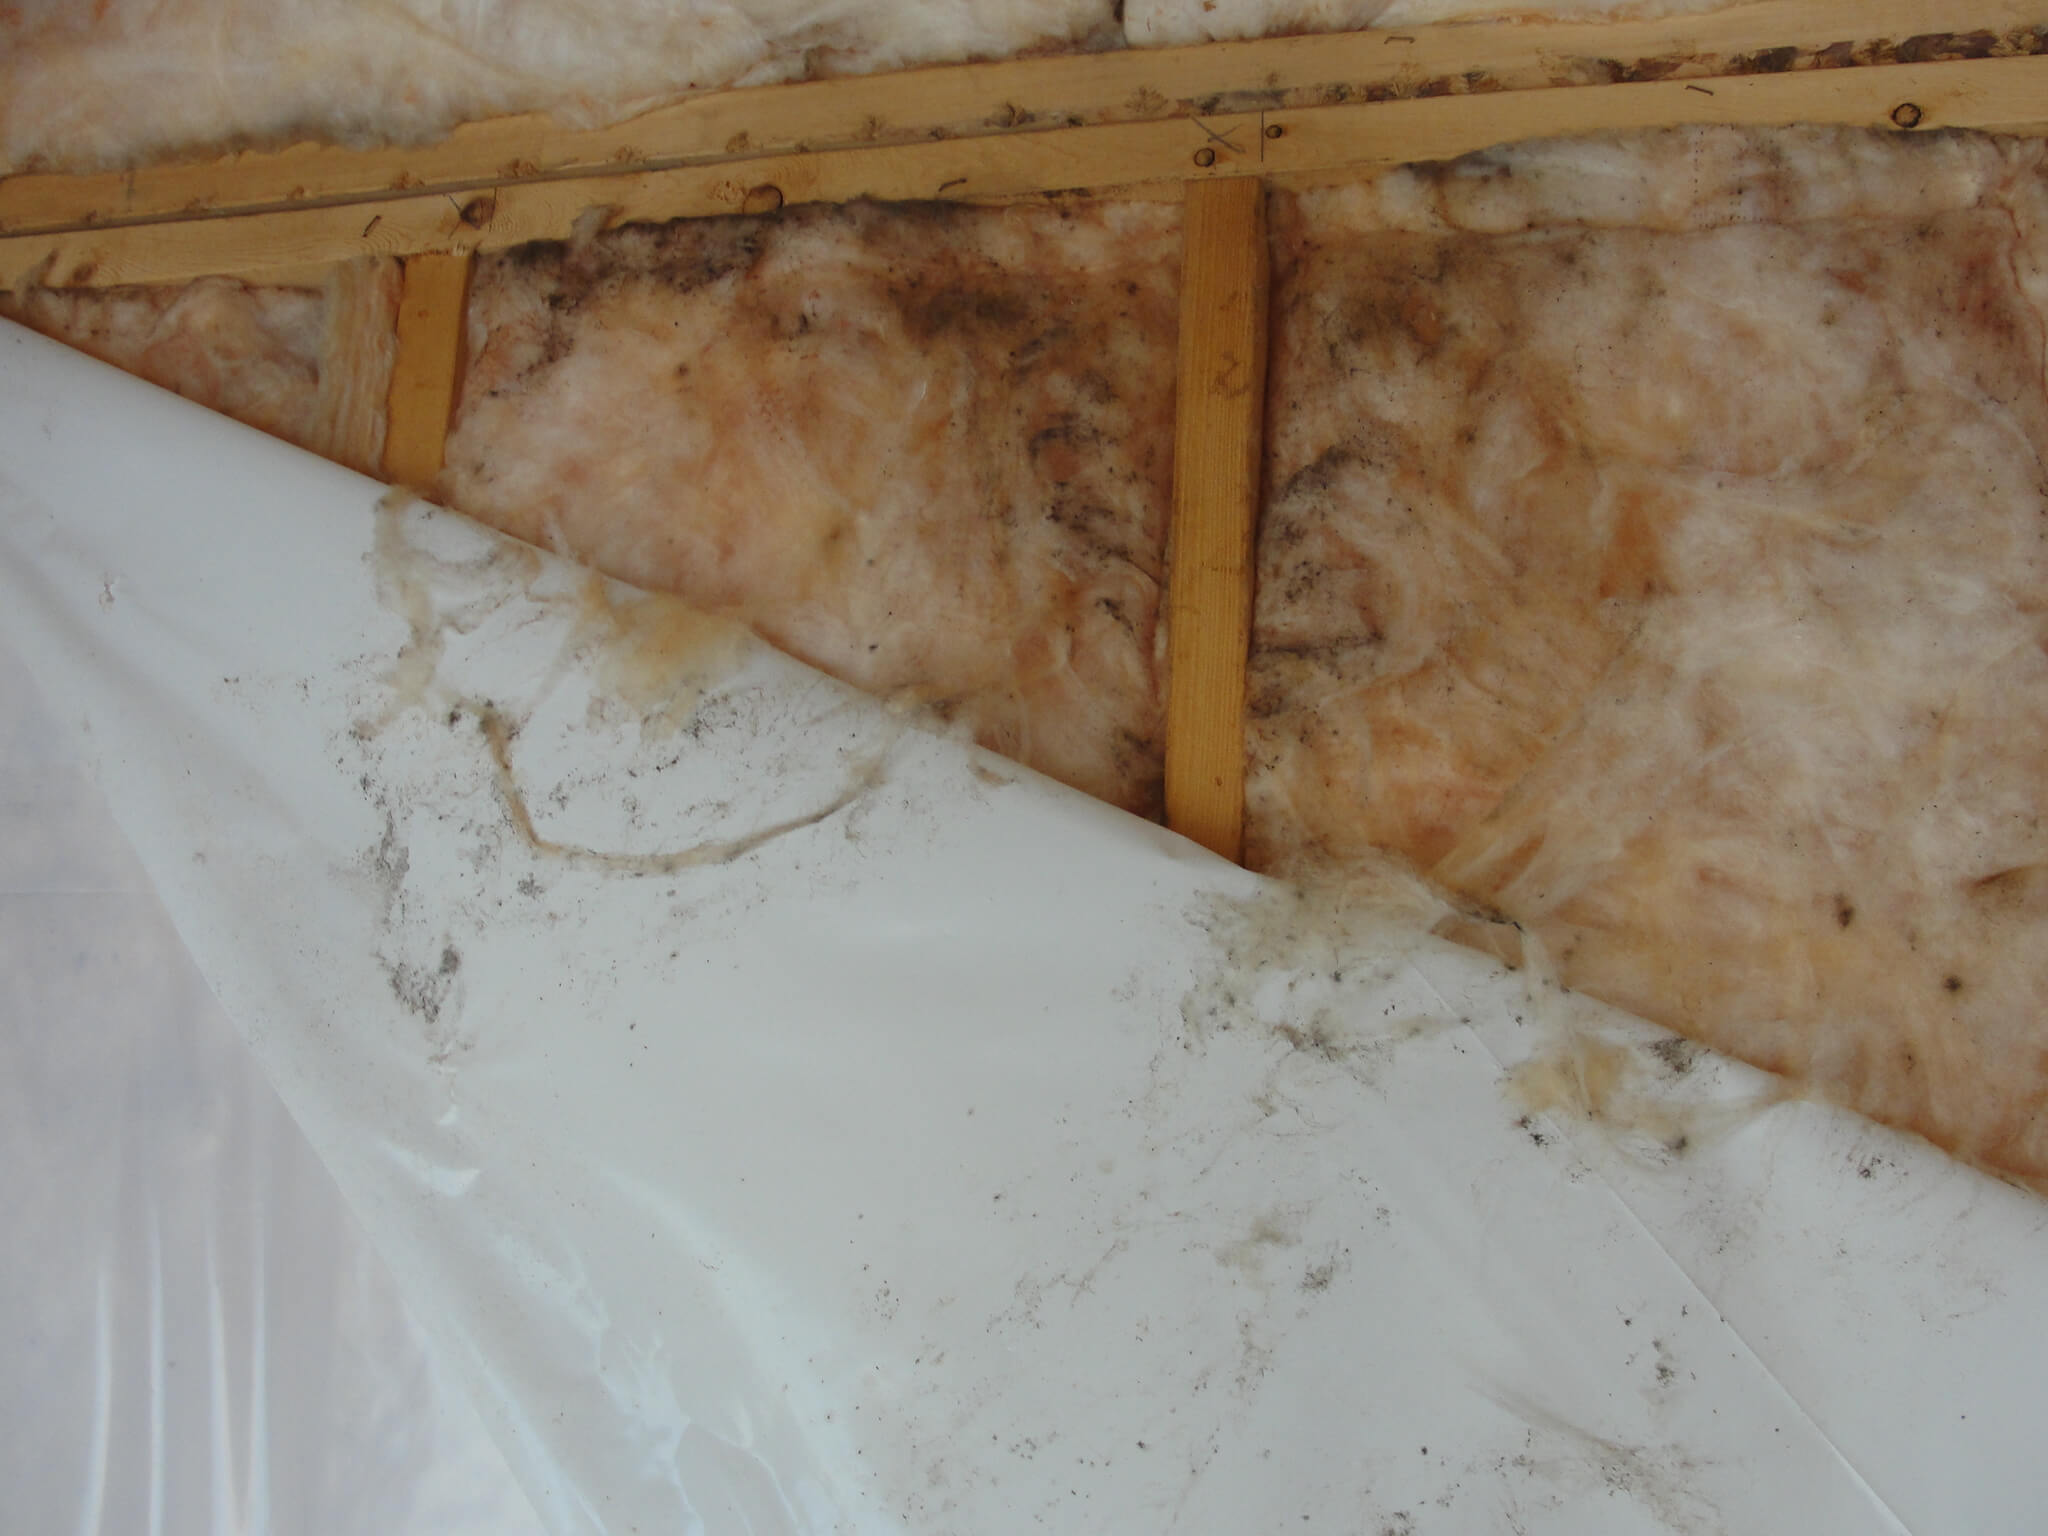
Unsealed vapor barriers can lead to mold growth.  When a vapor barrier isn’t sealed and air is allowed to freely pass through the wall, what happens when warm, moist air hits a cold surface?  It condenses.  My basement stays relatively cool and dry throughout the year, so the vapor drive is really happening from the exterior during the summer.  The walkout part of my basement faces south, so this part of the house is where I have the greatest temperature differential between the exterior and interior of the walls.
During the summer, as humid outdoor air passes through my walls and hits the relatively cool vapor barrier, the moisture condenses.  This summer there was never enough moisture to actually drip down to the floor, but it was enough to leave drip marks in the insulation and allow mold to start growing between the insulation and the vapor barrier.  This wasn’t major and I don’t have mold allergies, so I wasn’t too whipped up about this… but I couldn’t allow this to continue.
Mold in fiberglass batts Mold in fiberglass batts 2
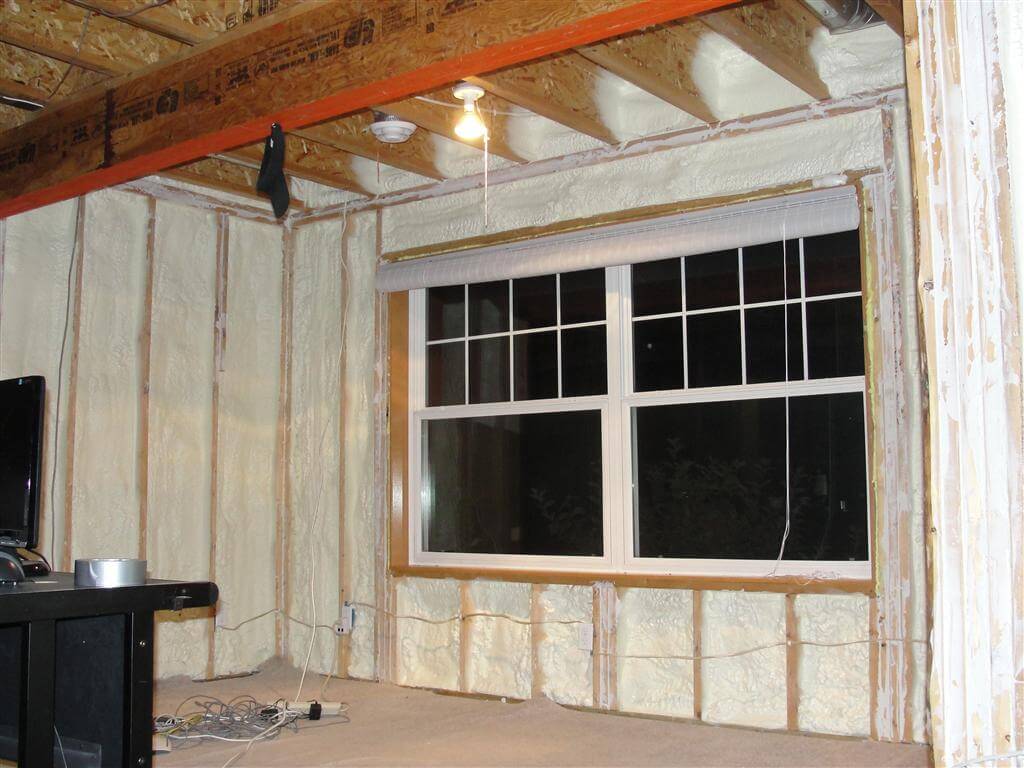
Enter closed-cell spray foam insulation.  To address all of the insulation, mold, and vapor barrier issues at the same time, I had the wood framed walls in my basement completely re-insulated about three weeks ago.  I had the vapor barriers removed, all of the fiberglass insulation removed, and closed cell foam sprayed in to the walls and rim spaces.
Foamed walls
I love it.  Closed cell foam acts as a perfect vapor barrier after 2″, it doesn’t allow for convection, and it has a much higher insulating value than fiberglass.  Now when I walk down to my basement, I don’t feel a drastic change in temperature; my basement is only about two degrees cooler than the rest of my house.  I can sit here at the computer without a space heater, and I no longer freeze my toes off.  Life is good.
Having foam insulation sprayed in to the walls was expensive, but it was worth every penny.  Will I ever get a payback in energy savings?  I’m not sure.  I didn’t even bother to check the numbers, because my main motivation for this project was comfort.  Saving energy and not having mold growing inside the wall cavities is just a bonus.
Happy Thanksgiving.
Reuben Saltzman, Structure Tech Home Inspections - EmailMaple Grove Home Inspections
        

Tuesday, November 15, 2011

"You're wasting your money on a home inspection, and we're not going to fix anything."

That’s what a local builder told one of my customers.  The home buyer hired me to inspect her new single family home before she finalized the purchase, and the builder apparently didn’t want to end up dealing with any hassles.  The builder’s rep told the buyer that having a new construction home inspection was a waste of money, and that even if I came up with any issues, it wouldn’t matter; the house had already been inspected by city, so they wouldn’t fix anything.
The home buyer said she felt like cancelling the entire purchase after hearing that, and I can’t say I blame her.  Who would want to buy a home from someone with an attitude like that?
Maybe the rep felt like he was being personally insulted when the buyer mentioned a home inspection, so he was getting defensive.  If that was the case, I say grow up.  This is just business.  Having an attitude like that will only turn buyers off, and make the builder look silly when the home inspector comes up with a list of installation defects.
It’s not supposed to be the home inspector against the builder; we’re both working for the home buyer, trying to make sure that any construction defects are addressed right away, before they turn in to a expensive problem.

My advice to builders

When builders use the old excuse of “the city already approved it” they end up looking like weasels.  Everyone knows that municipal building inspectors can’t possibly catch every little defect; no one can.   When a municipal inspector approves a permit, it means they didn’t find any defects; it doesn’t mean they’re putting their blessing on something that was done wrong.  When a builder tries to talk a home buyer out of having a home inspection done, it’s a huge red flag for the home buyer and the home inspector.
Builders should welcome a home inspection.  If the home buyer is nervous about the quality of construction, this is a perfect opportunity for the buyer’s fears to be assuaged.  If the home is truly well built, a good home inspector will say so.  While there may be a handful of overly zealous, hyper-critical home inspectors, most of us aren’t.  Most home inspectors appreciate neat work and best practices, and we love pointing this stuff out to clients.
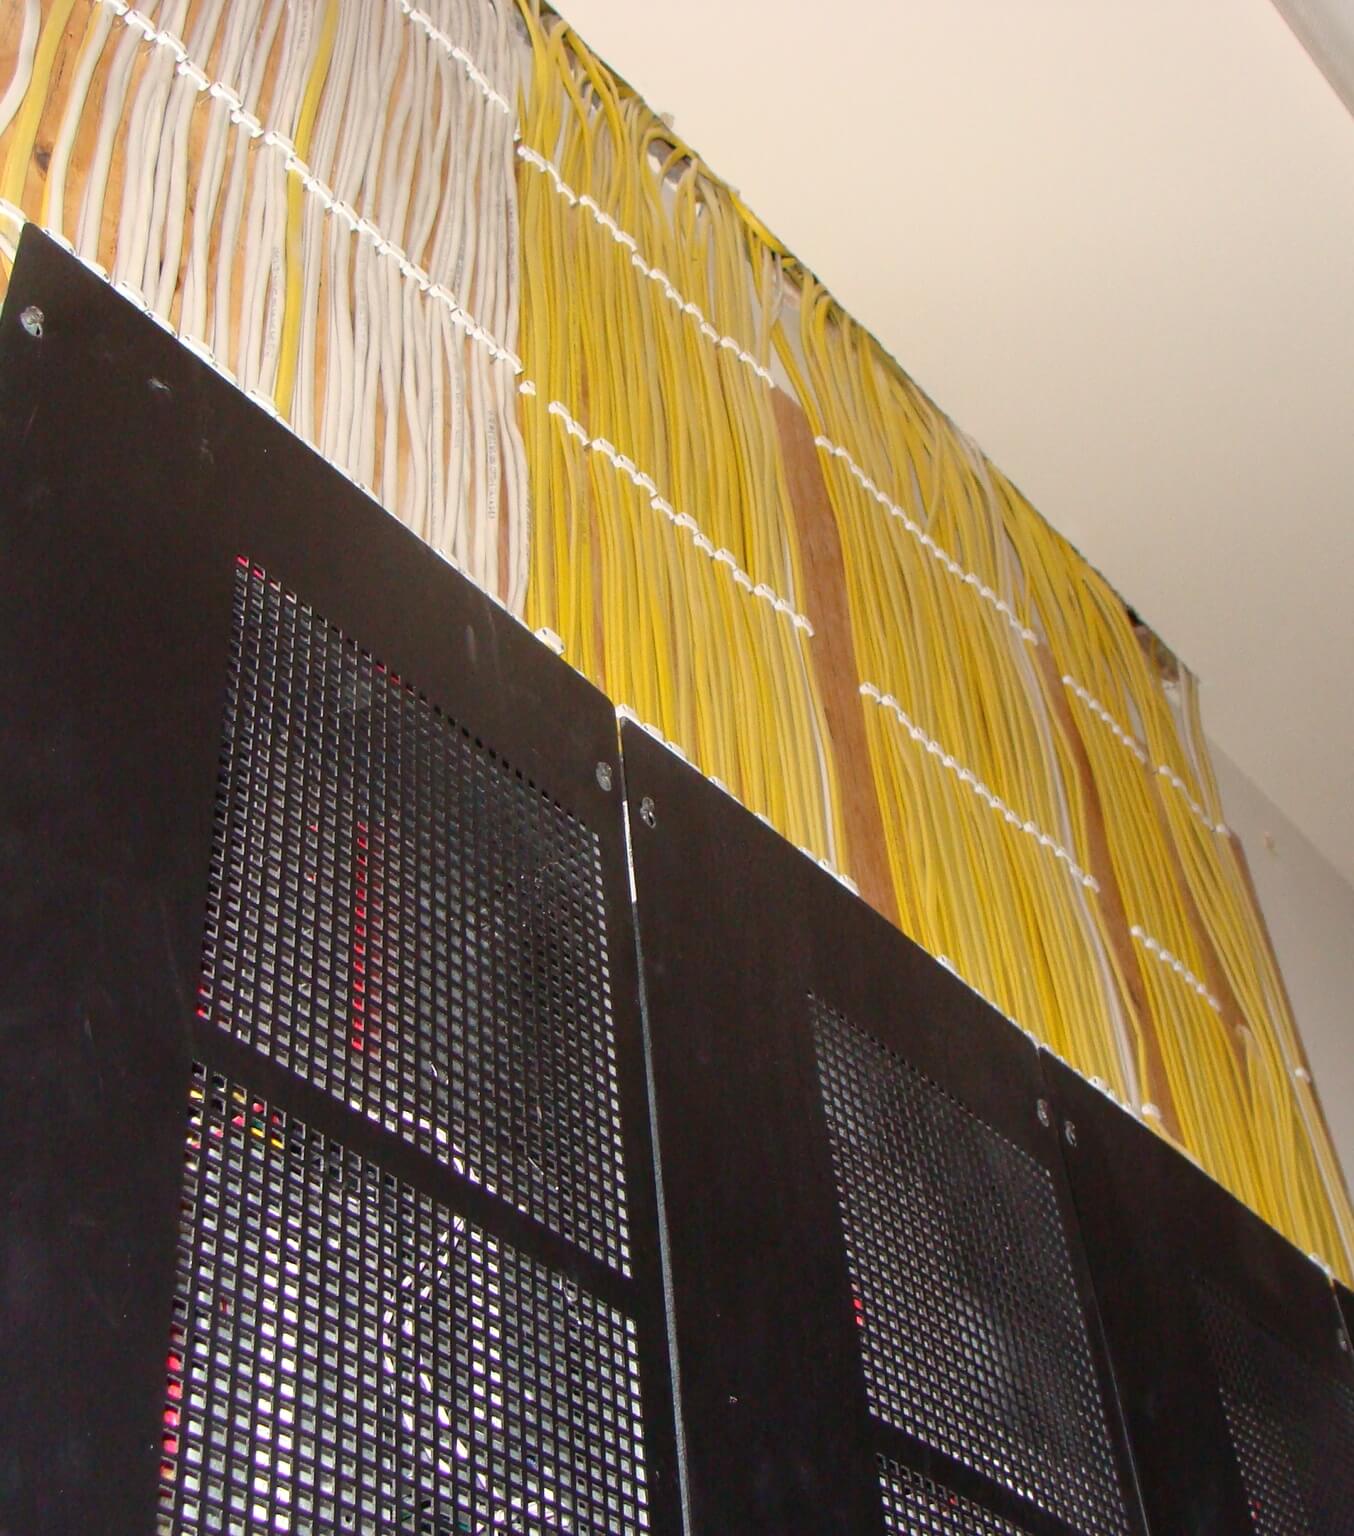
Neat wiresWhen I inspect particularly neat wiring, I make a point of telling the buyer that the electrician probably took a lot of pride in their work.  
When I inspect a new home with insulation applied to the exterior of the foundation, I explain how this is a more expensive way of insulating the basement, but it’s also a superior way of doing it.
When I see a drain pan installed below a washing machine on the second floor, I tell my clients about how this isn’t required, but it’s a nice safety measure that the builder added.
A home inspection is a PR opportunity for the builder.  If the home inspector comes up with a list of construction defects, the builder has a golden opportunity to fix the issues with a smile.  This creates trust and goodwill with the buyer, which can lead to referrals.
When a builder welcomes a home inspectionthey’re telling the home buyer that they’re confident in their work.    This concept seems obvious to me, but only the best builders seem to understand this.
Back to my original story.  I didn’t find a ton of defects at the new construction house I mentioned at the beginning of this blog.  It was all stuff that could probably be corrected in one day – a kitchen cabinet drawer that wouldn’t open because it was in a terrible location, a back-pitched plumbing vent, improper flashing above windows… stuff like that.  The buyer asked to builder to repair everything on my report, and wouldn’t you know it?  The builder was happy to fix everything.  I’m sure everyone will live happily ever after.
Reuben Saltzman, Structure Tech Home Inspections - EmailMinnesota Home Inspections